I was even playing around with some old leftover O scale fencing that I cut to possibly work as a railing to go around the platform. Not quite sure if it's going to work out for the way I want it to look though.
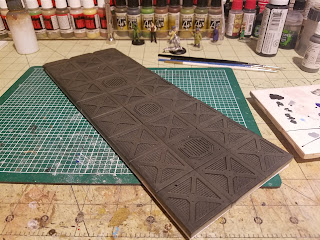
I got everything together pretty easily, though in hindsight I probably should have cut this section of tiles in half. I had a bit of warping occur after the glue set, which is super annoying. A quick wash, dry brushing the pipes and the grate plates and it looked pretty good.
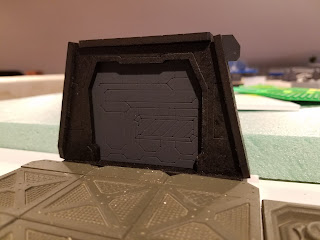
The mdf for the frame didn't take very well to the first black paint I tried, just regular Krylon primer spray paint, as you can kind of see in the photos below. I have to say, now that these are built I'm pretty impressed with them - initially I was pretty disappointed they weren't resin like all the other Spartan Games accessories but these are going to work really well!
I used Plastic Soldier Company spray on the door and it really took to the mdf and looks fantastic. I ended up going back over the black with Army Painter black paint and that too worked a treat - the last photo in this series, I forgot to take a close up of the re-paint. So just from this small test, miniature specific spray paint worked way better than "regular" spray paint for me, so I'll be continuing this practice going forward.
And a quick wash applied to the first hallway tiles.
Still need to do the dry brush and some highlights, but really happy with it even in it's current state. The door pictured here has the AP black paint applied.
Some really great news is that the tiles are actually bigger than one inch! They are well over an inch and a half, so that means my initial count of 1296 floor tiles that I need to cast will be greatly reduced! I think watching all the videos on You Tube and people talking about building their tiles into sections like 3x3, etc. put that thought in my head. I thought they meant 3 inches by 3 inches, but it was just the number of tiles used not any type of measurement - thankfully I was wrong!!
Moving inside, there is a perfect little nook on the first floor in the building complex for the above mentioned elevator. It is going to be located behind a secret bookcase wall, which will hide said elevator!
I used Evergreen styrene to make the elevator. That new paper cutter made quick work of the cuts and most importantly they were all straight!
This was the first time I'd really used styrene glue and it worked brilliantly! So glad I didn't try my standard super glue to attempt to put this together.
In place with the to be built book case in front.
I used scrap pieces of mdf from old 4Ground kits to make some hand rails and other trim in the elevator. Just need some paint.
Super easy and fast to put together. There aren't even any directions, they are that easy to put together.
I added some styrene to some places that you could see the joints between the pieces of mdf and I think it makes a huge improvement.
I've improved the process quite a bit by painting the mdf before assembling, but of course didn't take any photos of those two.
Finished up these really neat cardboard boxes from 4ground too.
I do have to admit, this whole making multiples of the same item thing is getting annoying pretty quick though! Repeat 29 times...
Well I did and it's pretty amazing how good they look. I've already found some neat labels while searching online that I'll stick on the sides and tops soon.
So lots of WIPs, but moving in the right direction.
I did make a bit of a mistake by not realizing I'm going to need Hydra soldiers for the Carter gang to go up against. I've got nothing available currently. I have a bunch of WWII Germans but obviously don't think that they'll work if I put the setting in the US - plus they are based in the traditional way, it'll look a bit silly with figures having grass and flowers on their bases in an underground facility. So that's a new hurdle.
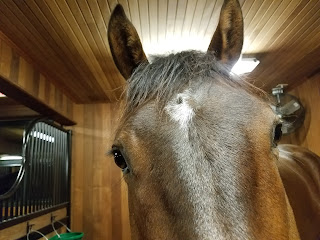
As I mentioned, I was trying to get this up before everyone arrived home, unfortunately that didn't happen. Wife and horses are all home safe and sound now - no one would cooperate for a picture, but this one of Skyfall was pretty funny!
As always, thanks for looking!
Ivor


All coming along very nicely!
ReplyDeleteThanks Gordon!
DeleteLots of great bits and pieces there!
ReplyDeleteIndeed there is, thanks Bill!
DeleteComing together very nicely Ivor, an idea for you if you want to try it, after your finished painting the pipes in the floor there a little rebates in those tiles that works for putting some clear plastic across the pipes so you don't get wobbly models when their standing on a pipe tile.
ReplyDeleteYou've gone to an amazing lengths with this & I'm sure it's going to look fab when all finished, a great bit of work.
Ivor I'm not sure what your looking for model wise to go up against but to me these guys look like they might fit the bill.
Deletehttp://ainstycastings.co.uk/index.php/cPath/68/sort/2a/page/1/osCsid/84daa4b285f394b5074e45a20b7e9817
Thanks a lot Frank! That is actually a brilliant idea regarding the clear plastic - there is also a hatch type tile that there is no way a figure is going to be able to stand on that would be perfect for that.
DeleteRegarding the figures, ironically I just placed an order with Ainsty last week to round out a few more pieces I needed for the main generators and power supply, and never even bothered to look at the figures!
DeleteI actually found some separate heads form Warlords new Konflikt 47 line, but they are $10.00 US for just 5 heads!!?? That's crazy! https://us-store.warlordgames.com/collections/konflikt-47/products/german-assault-pioneer-helmet
I did find these from Blackball Games which are almost perfect http://blackballgames.bigcartel.com/product/german-greatcoat-officer
My concern though is the lack of poses, as I'd probably need at least 10 or so of this type of soldier. Not quite sure exactly how much variation I'll be able to do.