Clear bases. It seems that no two words divide the miniature figure community more right now. Here are some of my favorite things I've read when someone brings up clear bases - "they look awful", "they look cheap", "the frosting around the feet looks terrible", "they look dreadful", "the glare on the edge is annoying", "they look ridiculous", "I wouldn't use them on my "real" models", etc etc etc.
Before I go any further, let me state emphatically that they are your models, do what you like and what you feel looks right in your eye. Clear bases isn't for everyone, and traditional basing doesn't work for everyone either. Do what is right for you, end of story. Just make sure that you do some kind of base so your models don't fall over, because ultimately that's the whole purpose of the base anyway.
Also, don't get me wrong, I absolutely love the rank and file figures done with a traditional wargaming base, and I'm not sure some of these types of figures should ever be on clear bases.
But in saying that, maybe all rank and file figures should be on round bases in movement trays? Maybe they should only be on a square base? Or rectangle bases? Do I use plastic or wood bases? 1.5mm thick? What about different rules sets? What happens when I have square bases and my opponent has round? As you can see we can go in circles on this all day, and again, it all comes down to doing what is right for you and if it looks right to you.
With all that being said, I personally play a lot of skirmish games, so the decision to go to clear bases on those types of figures in my collection was easy for me. And one that had been thought about for years - I'll go into the exact reasons why shortly.
What I do find extremely interesting, and honestly incredibly frustrating, is when someone comes out and says that clear bases are "lazy". And I keep hearing this point over and over again as an argument not to do it. What exactly is "lazy" about a clear base? This is the million dollar question to me. Is it the amount of "work" done to make a clear base? If it's that, are people who commission out their figures to be painted lazy? What if you buy a used army or some figures that are already painted, does that make you lazy because you didn't do it yourself? What about these new flat plexiglass figures and terrain I'm seeing a lot now? Again, we can go in circles on this.

Maybe I missed the rule in the "How to Properly Base Your Figures" handbook that says a model is only complete when flock is applied around the base, and two tufts of grass are glued on along with one horribly out of scale rock? I was a huge fan of that, and as you can see, I did it all the time. In saying that, I have seen some absolutely incredibly based figures in my time and I completely appreciate that effort, and will never think that what they are doing is wrong.
But... here it is, the end all be all reason for me going to a clear base.
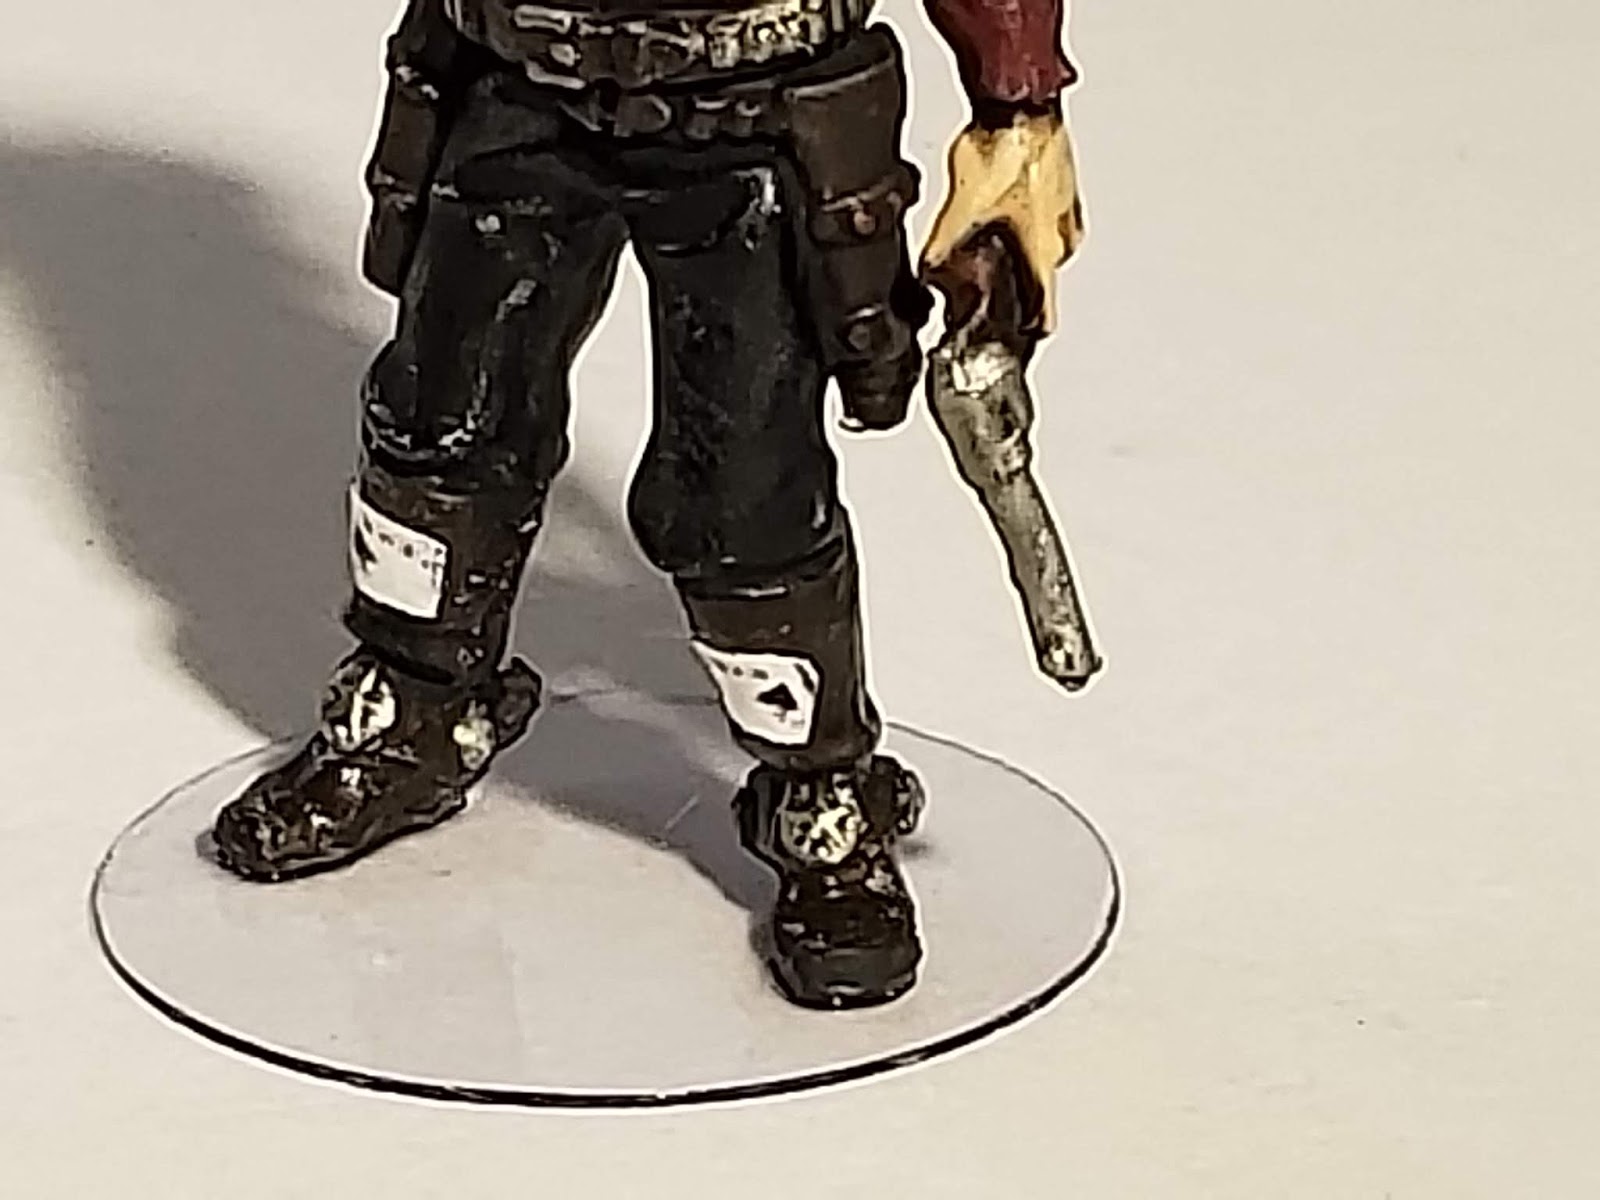
Regardless of where that figure is on the table - on a street, in a snow covered clearing, in a building, in a forest, on a boat, in the desert, etc. etc. etc., if it is on a clear base it is never going to look out of place. Zorro would look a bit odd up there with a grass or desert base no?
It's interesting because every single miniature game I've ever played my figures have moved all over the table at some point. They've never stayed in the same spot the entire game. What if these lads had a street type of base, would that look strange here?
And while moving over the table those figures have encountered different types of terrain and environments on that table. What if these guys had a more desert type of base, that'd be a bit of a weird photo no?
How many times have we had our figures on roads when their bases were full of grass and brush?
Certainly the Fellowship look odd in an Egyptian tomb, but would they look even sillier if they had bases full of grass in this particular environment?
Hills, grass, plowed fields, deserts, boardwalks, roads streams, sidewalks, stone floors, wood floors, etc. etc. etc. if that figure is on a clear base, in my eye it will never look out of place, like here.
Now again, that may not be something that either bothers you or isn't even thought of as a concern.
Me? It takes me out of that moment visually. The photos above have always frustrated me because the bases seem so out of place in regards to where the figures are on the table. But again, your figures, your bases, your eye.
If changing over to clear bases is something you're thinking about, or even want to try on just a couple of figures, I will give you a step by step tutorial and some tips on how I do it. After going through many trails and errors over the last two years (here is my very first
tutorial on clear bases if you've interested, where I used to pin the figures to their bases), I've taken the best parts of that journey and I think I have finally found a way to make the clear base process the most efficient and effective as possible. But in saying that, this isn't the end all be all for making and using clear bases. I'm sure that this can be improved on, and if anyone has tips or tricks they want to share I'd love to hear them.
The tools involved are pretty simple -
Jewelers Saw
Sandpaper
Scrap Cardboard
Xacto Knife
Paint Brush
Snips
EK Tools 3/4 Inch (20mm) Hole Punch
Toploader Card Holders
Loctite Super Glue (Professional Liquid)
Citadel Seraphim Sepia Shade
Toothpick
Before I go any further, I will tell you emphatically that there are three items that have been absolute game changers in this whole process for me. And that has been the Loctite Super Glue, the Ultra Pro toploader card holders, and the scrap piece of card board - the combination of these three items has effectively eliminated the "frosting" effect that bother so many people.
So lets start from the beginning on how I go about basing a figure. The first thing you will need to do is cut the plastic for your bases from the top loader card holders. I use the Ultra Pro 3x4 regular card holders. I got 200 for $17.00 on Amazon - I won't have to buy any more for the rest of my life lol!
You'll cut off the sides and the bottom, as the top is already cut.
And this will now give you two pieces to make your bases.
The EK Tools hole punches comes in many sizes and shapes, and overall 1 inch (25mm) really seems to be the most popular base size for individual figures these days. But I definitely prefer the 3/4 inch (20mm) size for bases, as I personally think they look much better.
Here you can see the difference between the 1 inch (25mm) base on the left and the 3/4 inch (20mm) on the right. Now obviously with this particular example I had to put a 1 inch base on Inigo because of his pose, and that will absolutely happen from time to time, but I guarantee you'll be surprised at exactly how many figures you wouldn't think could fit onto a 20mm base that do, and look way better for it. But to me this photo really shows just how much bigger that quarter of an inch makes visually. It's night and day to me, and why I always use the 20mm base.
In order to punch out your bases you do have to flip the EK Tools circle punch over so you can see exactly where you are at on your piece of plastic. It can be a bit awkward, and be very careful of the bases popping out quickly and onto the floor, they can be quite difficult to find on the carpet.
At 3/4 of an inch I'm able to get a total of 24 bases out of just one card holder - so you can easily see that one package of card holders will keep you pretty well set for ages with bases.
Now that we have our bases cut out we'll start on getting the figure ready. I will show you how I cut the bases off of two of the most common types of figures - the slotted figure, and I guess we'll just call the other one a "normal" figure. Here we have two examples from Knuckleduster, Curly Bill Brocius and a bandito.
Obviously the slotted figures are much easier to cut - you could probably just use an Xacto knife, but my preferred method of cutting the figures is a Jewelers Saw. I use a size 0 blade and I will tell you that I do break blades like there is no tomorrow - I have a ton of this size blade from a bulk purchase because they were super cheap (144 for $6.00), so something I will try when I go through all of these is the next size up to see if that reduces the breakage frequency. Despite the breakages this has been the best way I've found to cut off the base for me.
Once Curly Bill is off his base I check to see if he can stand on his own. With the slotted bases I usually don't have to sand down the feet at all, but if the figure doesn't stand on its own, a couple of passes on the sandpaper will get the feet even. It's probably hard to see in the photo because of the angle, but Curly Bill did lean forward a bit so I took him over to the sandpaper to even his feet out.
One trick that has kept the feet even for me is to pull the figure across the sandpaper and then pick it up and do it again - don't rub the figure back and forth. I found that rubbing the figure repeatedly back and forth wasn't getting me a flat bottom on the feet.
Once you've got your feet even it's time to touch up around the boots with a little bit of paint. This one was actually really good and didn't need very much touch up, but between the cutting and sanding you will inevitably be touching up spots with some paint while doing this.
Next is to get your base ready. As I mentioned above when you're cutting the bases out you can lose them easily because they are so hard to see - what I do is get the base I'm going to use next and place it right in the middle of an index card. This allows me to see the base much easier as the above photo shows.

Now it's time for the glue. Again, this stuff has been the absolute game changer in terms of the "frosting" everyone complains about with clear bases. This is by far the most expensive super glue I've ever used but it gives me about double the actual glue compared to what I get in a single bottle of my old go to Gorilla Super Glue even though the bottles are practically the same size (look at those Gorilla Glue bottles brand new out of the package, they are half empty right from the get go?!?!). With the coupons you get from craft stores (who hand them out like they are candy) I'm only paying about $4.00 a bottle. While its only being used exclusively for basing figures, I've been using this same bottle for probably a good six months or more and it's still over three quarters full.

Once you've applied your glue to the bottom of the figure you want to next bring it over to the scrap piece of cardboard and place it on it. This will push out any excess glue. This has been the other big game changer in this process. What was happening before was all that excess glue was pushing out
on the base and causing the "frosting" effect - utilizing the cardboard now eliminates all that excess glue before it even hits the base.
Then it's off to placing the figure on its new base. It takes literally a second for the figure to adhere to the base.
And that's it, easy peasy lemon squezzy you've now got yourself a figure that will won't look out of place wherever it is on the table.
And the best part of all, zero "frosting". And the bond is solid - I've yet to have any figure come off its base using the Loctite glue.
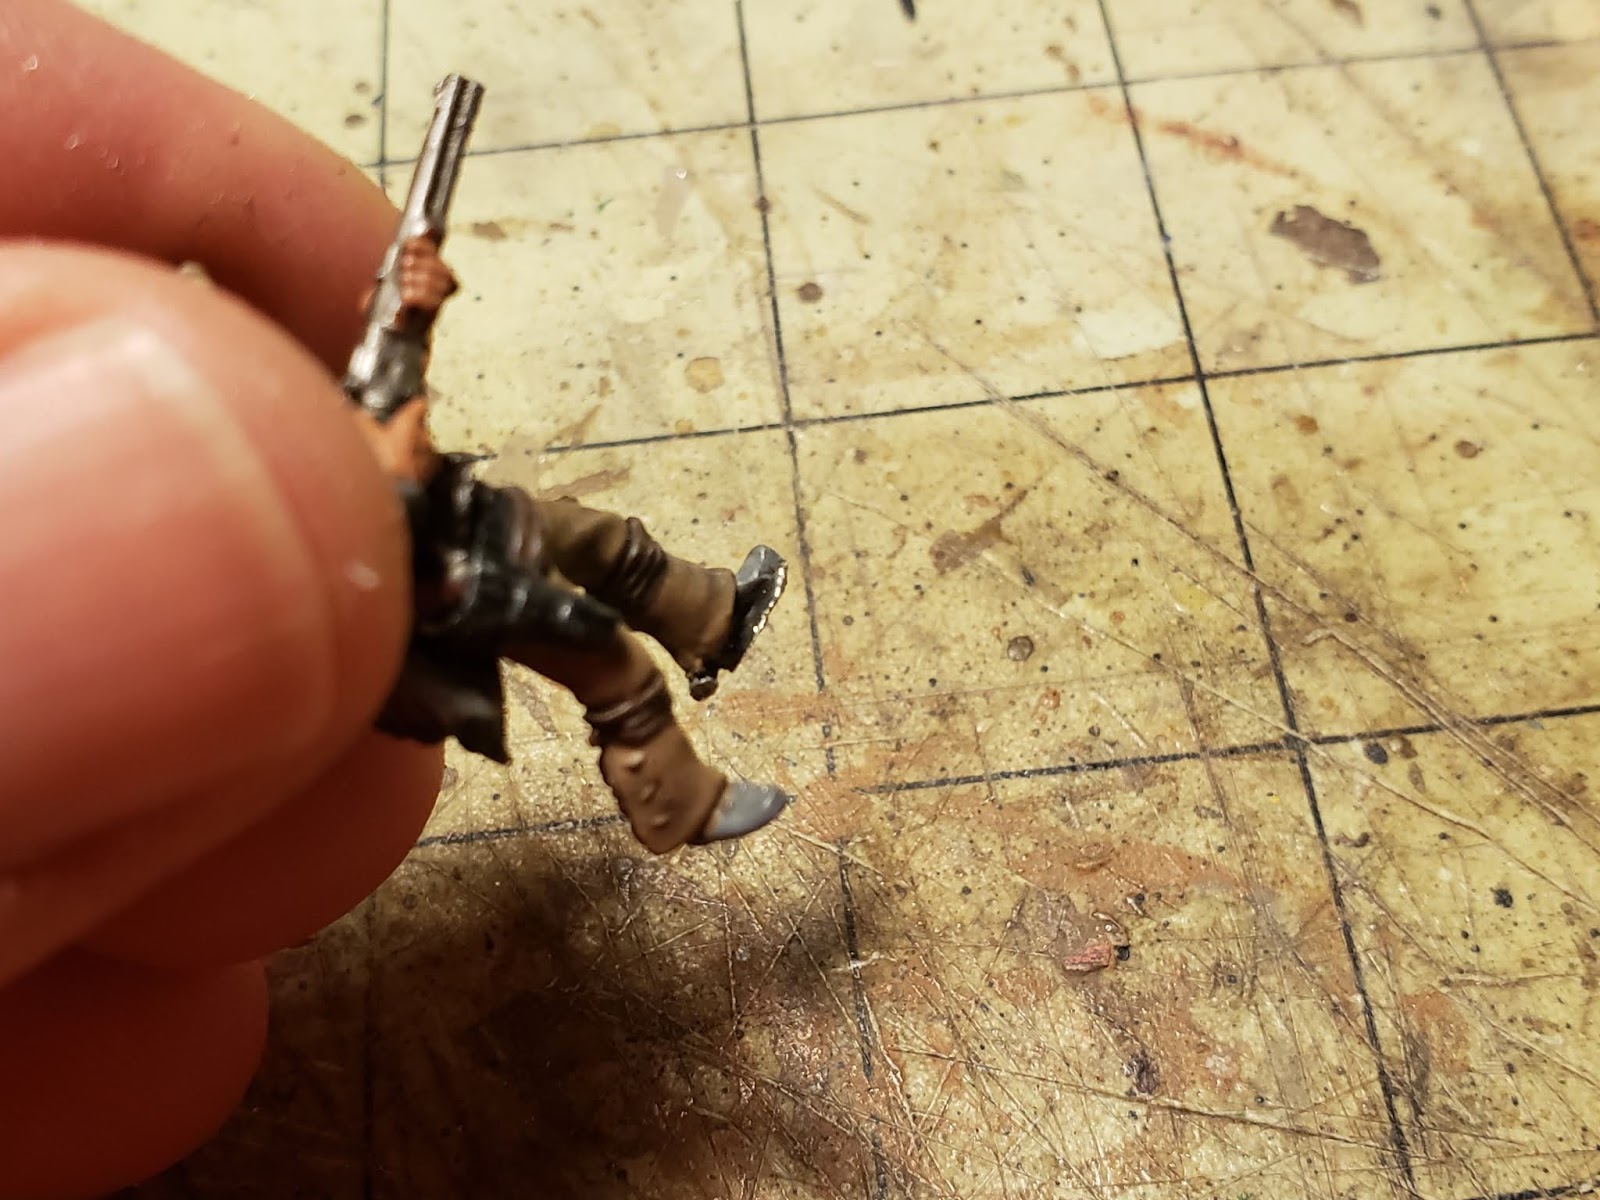
So let's give our "normal" base figure a go, the bandito. This particular model has a really small base and one of his feet was raised off the base, so again I used the jewelers saw as it was much easier to cut than with the snips. With these types or bases you can use the snips in my tools photo instead but be very careful as you can bend the legs as you try to cut close to the feet.
Again, very easy to get him off the molded base.
This figure needed a bit of sanding to get him to stand up on his own.
A bit of touch up paint around the boots and he's ready for his new base.
Your Olan Mills glamour shot.
*that joke is probably only going hit at about 20% of the readership I'm guessing*
On a side note, it's interesting how different these two figures are in size despite both being from Knuckleduster.
And there you have it, two new figures based up and ready move anywhere on the table and not look out of place.
A couple of other things I want to mention about the punches - the 3/4 inch (20mm) base is by far my favorite and I think you can see why in all the examples above. But as I mentioned above EK Tools do have lots of other sizes which work great for different figures.
The 1 inch (25mm) base is perfect for those figures with a stretched pose.
The 1 1/2 inch (35mm) base allows for the basing of multiple figures onto one single base like these zombie hordes.
But I'm also going to blow your mind by letting you know I have oval bases that I'm doing mounted figures on.
If people were bringing pitchforks because of the clear bases on normal figures I can only imagine what these photos will do lol!
And the photo that will make heads explode!
But as I've stated over and over throughout this post do what you like and works for you.
The last thing I want to touch on is some tips for those of you that are having issues with the "frosting" because of either the plastic your bases are made of or the type of glue you are using. This is a figure I based early on in this crazy journey and is based on plastic taken from a regular old figure blister pack and the Gorilla Super Glue was used - you can see the glue and plastic didn't work well together at all and I've got a problem area around his foot.
As crazy as it sounds, take a toothpick and cut a really nice point on the end with an Xacto knife and then use that toothpick to scrape around the foot - get as close as you possibly can with that point around the foot.
You'll be amazed at how much of that "frosting" you will take away with that toothpick - as you can see above. A simple but absolutely invaluable tool.
Now to clear that "frosting" up even further take a wash and basically do a dry brush application around that last bit around the feet. By dry brush I mean almost taking all the wash off the paint brush and then stippling it around the feet.
Voila! Just like that no "frosting" effect.
Wow, this has been incredibly long, and if your still with me at the end I really do appreciate it! But more importantly I hope you will have gotten something out of all this, as well as the thought process behind why I use clear bases. And for the very last time it's all about personal preference, if this isn't something that would work for you that's totally fine, I get it. But I honestly feel there is a place for this type of basing and I really think you will be seeing a whole lot more of it in the future.
Until next time, cheers!
Ivor