
"It's too big to be a Space Station"

In a way this quote from Star Wars A New Hope kind of sums up my feeling on the 4Ground Sassy Gal Saloon - it's too big! And by that I mean in relation to all the other 4Ground buildings, on average four times as big. The side street and two story buildings are 4 inches wide, the saloon is 12 inches wide.


For months I've been looking at other peoples completed models on the table and thinking, "That thing is huge! It's going to make everything else look way out of proportion!", and in my opinion it does (certainly doesn't make me right though!). Especially when a third floor is added, something no other Dead Man's Hand building has. Again, though, just one nerds opinion - and I want to be very clear, it's an absolutely fantastic model with a ton of gameplay options and there is absolutely no regrets with the purchase - I just feel when you look at it in relation to the rest of 4Ground's DMH range, it's completely disproportionate to them.

To the build itself. First, I knew I was going to end up changing the colors throughout. I initially was going to change the yellow (I pre-ordered the yellow version) because on the box and every picture I'd seen, it was a pretty bright yellow. When I opened the box I was pleasantly surprised by how muted the yellow actually was and decided that the color fit well with the rest of my buildings. What I did decide to change was the red. I used Plastic Soldier Company's British Armor spray to paint all the trim, the interior hallway walls, and main bar floor walls. The porch railings were changed as well and painted white.
I've built a lot of 4Ground kits, enough now that I kind of skip around in the directions anymore. For instance, I built the roof first - this was such a monster kit that I felt I needed to complete something easy (to trick myself into thinking I was progressing nicely) to start with, so the roof it was. It was when the roof was completed that I set it on the table where I'd already decided the saloon would go that it hit me how big this thing really was going to be.
The first floor went together easily, with no issues at all. It was when I got to the wrap-around porch that I started to change things around. I was really surprised when I saw that the posts for the porch also extended to the outside wall of the saloon. I felt this made the walls look too cluttered, especially with all the windows there. It was a really easy customization to cut the back posts off, and I think it greatly improves the look of the building.


The other thing I noticed when working on the porch was how the sheer number of posts made the entrances into the saloon pretty small in my opinion. The solution was to eliminate two posts in front of each entrance. Again, really easy, and I think it improves the overall look.


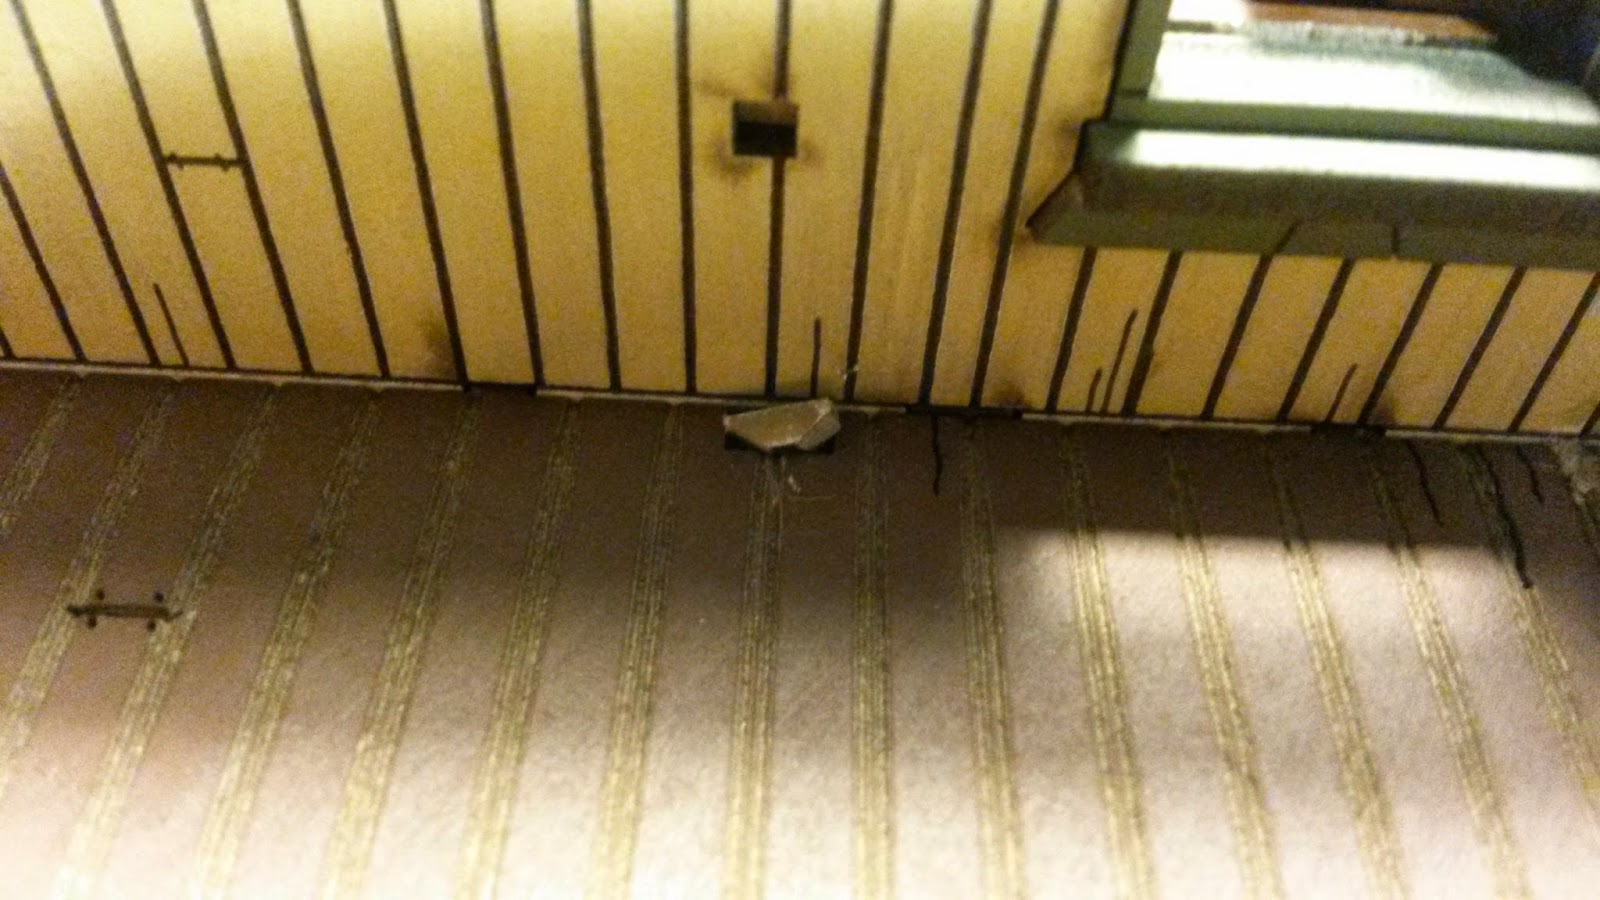
There was a little issue with the porches on the first and second floor where the posts that go into the floor - those holes I had to fill in. I had tried a few different things and nothing worked or looked right. I ended up using the "glue sticks" that are randomly placed in the sprues to fill the holes. I cut them to size and then cut the bottom similar to a wedge so they fit into the hole much easier. Below is a photo of the side view of the wedge. Flip it right side up and it fits in nicely to the hole
The second floor was where it got interesting for me, and essentially what added about four extra working days onto the build. I've read threads on The Lead Adventure Forum, The Miniatures Page, etc. about what some guys do to the interior of their buildings turns them into "doll houses". I'm kind of on the fence on this one, especially because I'm a detail and narrative guy. Growing up I was always kind of in awe of my sisters Barbie stuff - the level of detail and exactness, in the kitchen area for example, was just insane! To see forks and spoons next to plates, cereal boxes in the cupboards, opening refrigerators with food inside, etc. It was mind blowing, especially for someone like me who was all about details.
 |
| First Floor |
 |
| First Floor Bar |
 |
| First Floor Stage |
 |
| First Floor Overview |
The second and third floors each have eleven separate rooms between them - five on the second and six on the third. Seeing other completed builds I knew I couldn't just leave the walls bare. It just looked too bland. I decided to "wallpaper" each room in what I felt was as close to a Victorian Era pattern as I could. I had wanted to do this on some of my other builds, but it always ended up being an afterthought. If I was going to do it, I felt it would be way easier to do it during the actual build and not after. The second floor back wall I didn't do the wallpaper because initially I didn't want to do the extra work framing out the windows. Lazy, I know. I did decide to do it on the third floor and it does look way better, so that is something I am going to need to re-visit. Overall it was pretty easy - just time consuming, especially re-framing out the windows with the styrene strips, which is why I initially didn't want to do it! So, does it look like a doll house? Maybe, but I certainly think it looks better than just plain wood walls.
 |
| Second Floor |
 |
| Second Floor |
 |
| Second Floor |
The second floor posed a bit of a problem with the porch posts because they weren't set up like the first floor posts. The first floor posts were great because there wasn't a notch that attached them to the building itself - so it was just a simple cut of the posts and nothing had to be done to the walls themselves. The second floor was a different story. Each post had a notch that attached them to the wall, so I had to figure out how to fill in those holes on the outer walls. I'd had a nightmare of a time trying to fill in similar holes on the bank, so I knew right off the bat what wasn't going to work for me! The holes were too low to the ground to use my lamp trick I used on the bank, so I came up with putting a strip of wood around the walls. I painted it to match the rest of the trim and cut each piece to fit into place. Easy enough, the question now is do I do that on the first and third floor so they all match? I would really appreciate some feedback on thoughts about that.


The second floor set of stairs was the only part of the build where something was amiss. I was missing a step, part J9, and you can see in the picture below where the part number was etched out but the piece itself wasn't cut out unfortunately. It'll probably be easiest to just cut a step out myself, as contacting and then getting 4Ground to send one step all the way across the ocean seems a bit silly.

Third Floor
 |
| Third Floor |
 |
| Third Floor |
 |
| Third Floor Office and Double Room |
Little details were placed throughout - paintings, a cabinet behind the bar (that desperately needs some paint and now unfortunately makes it too small to fit a figure back there - the cabinet is sitting on the bartender's base!), beds/desks in the rooms, etc. I made a small "Our Scales Are Square" sign on the wall next to the bar and probably will replace the billiards picture behind the bar with a picture of Abraham Lincoln. I will also say it was disappointing I had to shell out another $15.00 to get the sub-base for the saloon so it would match every other building on the table.

By now you have noticed that I also changed the name of the saloon to The Gem Saloon. Obviously no where close to being accurate to the Deadwood version of the Gem, but something this big and such a focal point on the board it could only be The Gem! Plus, with the "Sweagin" figure and other Deadwood figures I ordered from Brigade Games last week it was a no-brainer!


I still have to get a new base cut (my first one ended up being about an inch too short on the back end, imagine that!) and the usual scenery up, hitches, lamp posts, etc. - I probably should have finished that before I posted this, but I couldn't stand keeping this in edit mode any longer.
Hopefully I'll get the "not" Deadwood figures all painted up and into The Gem soon to start corrupting my nice little town of Fords Canyon.
As always, thanks for looking!
Cheers,
Ivor


